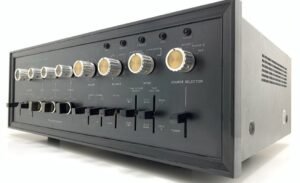
Refurbishing an old Sansui audio amplifier is a rewarding task that brings a piece of audio history back to life while enhancing its performance to modern standards. Sansui, known for its high-quality audio equipment during the golden era of hi-fi, produced amplifiers that are still revered for their warm, natural sound and solid build quality. Here’s a description to understanding a well done refurbishment task for a vintage Sansui amplifier.
Why Refurbish a Sansui Amplifier?
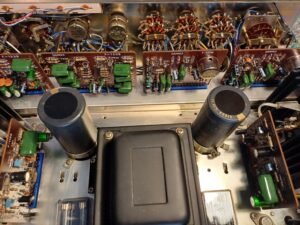
Sansui amplifiers, particularly those from the 1970s and 1980s, are prized for their exceptional sound quality and robust construction. However, like all electronic devices, these amplifiers are subject to wear and aging. Components such as capacitors, resistors, and transistors degrade over time, which can affect sound quality, introduce noise, or even lead to complete failure. Refurbishing is the way to restore the amplifier’s original performance or even enhance it, ensuring that it continues to deliver high-fidelity sound for years to come.
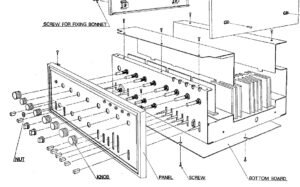
| Key Components we inspect and may replace
Capacitors Transistors Resistors |
| Cleaning and Restoration
Exterior Cleaning Interior Cleaning |
Testing and Calibration
After replacing components, it’s important to test the amplifier to ensure everything is functioning correctly. This includes checking the bias and offset voltages and calibrating them according to the service manual’s specifications. Proper calibration is essential to prevent distortion and ensure optimal sound quality.
Upgrades and Modifications
While the goal of refurbishment is to restore the amplifier to its original condition, some may want to to have modifications done to enhance performance. This might include upgrading the input and output connectors and installing higher-quality internal wiring.
Final Thoughts
Refurbishing a Sansui amplifier is not just about restoring an old piece of equipment; it’s about preserving a piece of audio history. Whether you’re an audiophile looking to revive a classic or a hobbyist interested in the art of electronics restoration, bringing a Sansui amplifier back to life can be a deeply satisfying experience. With patience, attention to detail, and a bit of technical know-how, your vintage Sansui can deliver incredible sound for many more years to come.